Every year, it’s the same ritual. A storm appears on the horizon, and the frantic scramble begins: dragging heavy plywood sheets from the shed, wrestling them into place, and spending hours drilling them into your home’s exterior. It’s a stressful, labor-intensive process that leaves you exhausted before the storm even arrives.
The stakes are incredibly high. Hurricane season isn’t just an inconvenience; it’s a serious threat to your home and family’s safety. This underscores the need for reliable protection. It’s time to move past the outdated plywood method and embrace a modern solution.
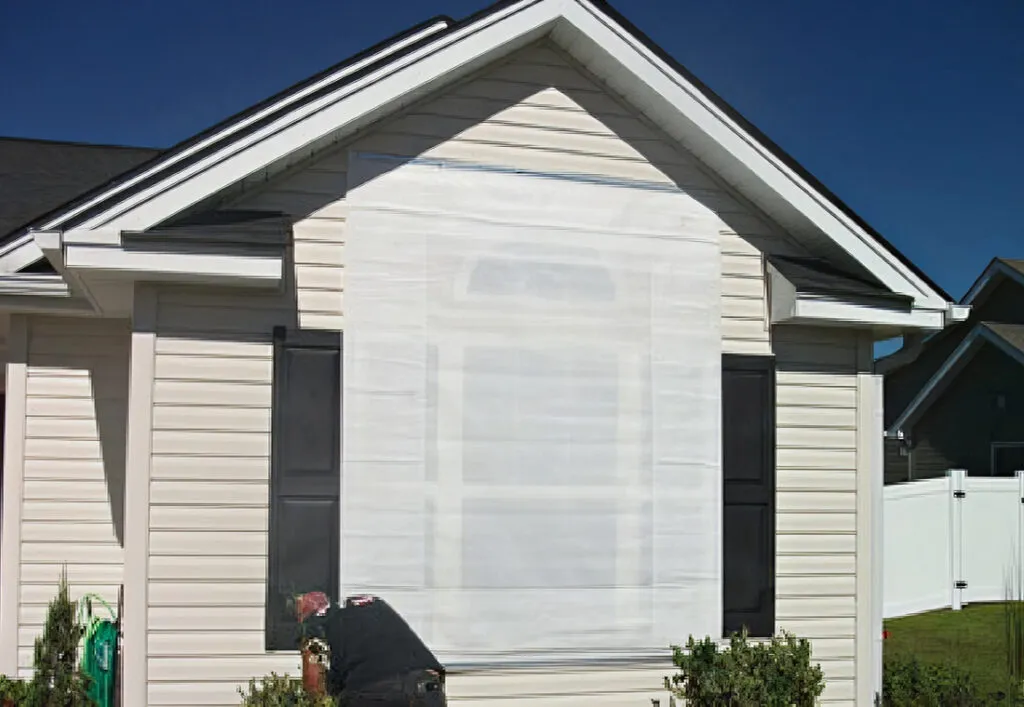
Hurricane fabric is a smarter, stronger, and more convenient alternative designed for today’s homeowner. Unlike rigid boards that can shatter or be ripped away by high winds, this advanced material is engineered to deflect impacts and dissipate wind energy. For homeowners ready to upgrade their storm prep, a complete DIY hurricane fabric installation kit provides the professional-grade materials and hardware needed to protect your home with confidence.
This guide will walk you through the entire process, from initial measurements to final deployment, giving you the knowledge to secure your home like a professional.
Why Hurricane Fabric is the Smart Choice for Home Protection
Choosing the right storm protection can feel overwhelming. You want something that’s undeniably strong but also manageable and affordable. Hurricane fabric ticks all these boxes, offering a superior alternative to cumbersome plywood and expensive metal shutters. It’s an investment in both your home’s security and your peace of mind.
Plywood vs. Hurricane Fabric: A Side-by-Side Comparison
To understand why so many homeowners are making the switch, let’s look at a direct comparison. The advantages of hurricane fabric become clear when you break down the key factors.
| Feature | Plywood | Hurricane Fabric |
| Strength | Rigid and prone to shattering or being torn off by extreme wind pressure. | Flexible and designed to deflect wind and impacts. It’s tested and proven to protect homes from Category 5 hurricanes with winds over 157 mph. Stronger than the competition. |
| Convenience | Extremely heavy, bulky, and difficult to handle. Requires significant, dry storage space. | Lightweight, easy to handle, and rolls up compactly. Stores easily in a garage, closet, or shed. |
| Installation | A multi-hour, physically demanding job requiring cutting, lifting, and drilling before every storm. | A one-time anchor installation. Deployment before a storm takes just minutes per window. |
| Cost & Value | It may seem cheaper initially, but it often requires replacement after one or two storms. The cost of time and labor is high. | A reusable, long-term investment. You can save thousands by installing it yourself, and it’s designed to last for years. |
Step 1: Pre-Installation Prep—Your Toolkit and Measurements
Proper preparation is the foundation of a successful DIY project. Before you drill a single hole, taking the time to gather your tools and get precise measurements will ensure a smooth, error-free installation. This is where you set yourself up for a professional-grade result.
Assembling Your Tools and Materials
A good DIY kit will provide all the specialized hardware—the anchors, bolts, and washers—but you’ll need a few common household tools to get the job done.
Must-Have Tools:
- Tape Measure
- Hammer Drill (for concrete, brick, or stucco)
- Standard Power Drill (for wood siding)
- Drill Bits (appropriate size for your anchors)
- Level
- High-Quality Exterior Silicone Caulk and Caulk Gun
- Safety Glasses
- Work Gloves
- Socket Wrench or Hex Driver
Nice-to-Have Tools:
- Chalk Line (for marking long, straight lines)
- Step Ladder or Extension Ladder
- Small Shop-Vac or Brush (for clearing drilled holes)
Safety should always be your top priority. Always wear protective gear like safety glasses and gloves, especially when drilling into masonry.
How to Measure Your Openings Like a Pro
Accurate measurements are the single most important part of this process. An incorrect measurement can result in panels that don’t fit, compromising the entire system. Remember the golden rule: measure twice, order once.
The core principle is simple: the fabric panel must extend beyond the window or door opening to allow it to be securely fastened to the solid wall framing around it.
How to Measure a Standard Window:
- Measure the Width: Measure the full width of the window opening, from the outside edge of the trim or brick on one side to the other.
- Add Your Overlap: Add at least 6-8 inches to this width (3-4 inches per side) to ensure the fabric covers the opening and reaches the solid wall structure.
- Measure the Height: Measure the full height of the opening, from the top edge of the trim or brick to the bottom of the sill.
- Add Your Overlap: Add at least 6-8 inches to this height (3-4 inches top and bottom).
This gives you your final panel dimensions. For other openings like garage doors, sliding glass doors, or lanais, the principle is the same—measure the full opening and add a sufficient overlap on all sides to anchor into the structure.
Step 2: The One-Time Install—Securing Your Anchoring System
This is the permanent part of your hurricane protection system. By installing these anchors correctly, you’re doing the heavy lifting just once. From this point forward, preparing for a storm will be a quick and simple task. Answering the question, “Can I really install this myself and have it be as strong as a professional job?” comes down to this step. Yes, you can—if you place and set your anchors correctly.
Marking and Drilling Your Anchor Points
Precision here is key to distributing the force of the wind evenly across the fabric.
- Layout Your Panel: Temporarily hold your fabric panel over the opening, ensuring it’s centered and has the correct overlap on all sides. Use a level to make sure it’s straight.
- Mark the Top Corners: With the panel in place, use a pencil or marker to mark the wall through the grommets at the top two corners.
- Create a Guideline: Remove the panel and use your level or a chalk line to create a straight line connecting these two corner marks. Do the same for the sides and bottom, creating a perfect rectangle for your anchor placement.
- Mark All Anchor Points: Following your kit’s instructions for spacing (typically every 12-18 inches), mark the exact spot for each anchor along your guidelines.
- Drill the Holes: Choose the right drill for your wall material. For concrete, brick, or stucco, a hammer drill is essential. For wood siding, a standard drill will work. Drill a hole at each marked spot to the depth specified in your instructions.
Setting the Anchors
With your holes drilled, you’re ready to create the permanent, weatherproof mounting points for your system.
- Clear the Debris: Use a small brush or a shop-vac to completely clear each hole of dust and debris. This ensures a tight fit for the anchor.
- Apply Weatherproof Sealant: This step is crucial and should not be skipped. Apply a bead of high-quality silicone caulk directly into each hole. This creates a waterproof seal, preventing moisture from getting into your walls.
- Insert the Anchors: Push the threaded anchor into the caulked hole. You may need to tap it gently with a hammer to set it fully. The anchor should sit flush against the wall.
- Wipe and Cure: Wipe away any excess caulk and allow it to cure according to the manufacturer’s directions.
Once this is done for all your home’s openings, the hard work is over. You’ve just equipped your home with a permanent, professional-grade hurricane defense system.
Step 3: Storm-Ready in Minutes—Deploying Your Fabric Panels
When a hurricane watch is issued, you’ll feel a sense of calm knowing you’re prepared. Gone are the days of panic and power tools. Now, securing your home is a simple, repeatable process.
So, when a storm is coming, how long will it take to put up the panels? For a standard window, you can expect to be done in just 5-10 minutes.
Here’s how easy it is:
- Unroll the Panel: Grab the correctly labeled panel for the window or door you’re securing.
- Align with Anchors: Hold the panel up and align the grommets with the permanent anchors you installed. Start by securing the top two corners first to hold it in place.
- Secure the Hardware: Insert the bolts through the grommets and into the anchors. Tighten them by hand first, then give them a final turn with a socket wrench until they are snug.
- Ensure a Taut Fit: Work your way around the entire panel, securing all bolts. The fabric should be taut, but not over-stretched. This tension is what allows it to effectively deflect wind and debris.
That’s it. Repeat the process for each opening, and your home is fully protected in a fraction of the time it would take with plywood.
Post-Storm Care: Cleaning and Storing Your System
Proper maintenance will ensure your hurricane fabric lasts for many storm seasons, making it a truly valuable investment. Once the storm has passed and officials have declared it safe to be outside, taking a few simple steps will protect your system.
- Rinse Thoroughly
- Wash if Needed
- Air Dry Completely
- Roll and Store
Pro Tips to Avoid Common Installation Mistakes
A DIY installation is very manageable, but avoiding a few common errors will ensure your system performs flawlessly when it matters most.
- Mistake 1: Incorrect Measurements. This is the number one cause of problems. Always double-check your width and height measurements, including the necessary overlap, before placing your order.
- Mistake 2: Improper Anchor Spacing. Placing anchors too far apart creates weak points where wind can get under the fabric. Follow the spacing guidelines from your kit precisely.
- Mistake 3: Not Weatherproofing. Skipping the silicone caulk step can save you a few minutes, but it risks allowing water to seep into your walls, leading to much bigger problems down the road.
- Mistake 4: Storing Fabric While Wet. Even a little bit of moisture can lead to mold and mildew, which will degrade and ruin your fabric over time. Always ensure it’s completely dry before putting it away.
Beyond Fabric: Building a Complete Hurricane Preparedness Plan
Installing hurricane fabric is a massive step toward protecting your property, but it’s one crucial piece of a larger safety strategy. Physical home protection should be part of a comprehensive family emergency plan.
Take the time to develop a full plan that includes evacuation routes, communication strategies for family members, and a designated safe room if you are sheltering in place. Assemble a disaster kit with several days’ worth of non-perishable food, water, batteries, flashlights, a first-aid kit, and any necessary medications. FEMA provides comprehensive resources and guidance for preparing homes and families for hurricane season at Ready.gov.
Conclusion: Protect Your Home with Confidence
Ditching the annual plywood scramble for a DIY hurricane fabric system is one of the smartest upgrades you can make to your home. It’s a modern solution that offers superior strength against devastating winds, incredible convenience in both storage and deployment, and significant long-term savings.
By following this guide, you can complete the installation with confidence, knowing you’ve created a professional-grade barrier that will stand ready season after season. Protect your home the smart way and gain the peace of mind that comes with being truly prepared.